Google Analytics provides valuable insights into website traffic and user behavior, helping businesses make informed decisions. However, it’s crucial to filter out internal IP addresses from the data to ensure accurate analysis. By blocking these internal IP addresses, you can prevent them from skewing your website statistics. In this article, we will provide step-by-step instructions on how to block IP addresses on GA4, ensuring cleaner and more reliable data for your website
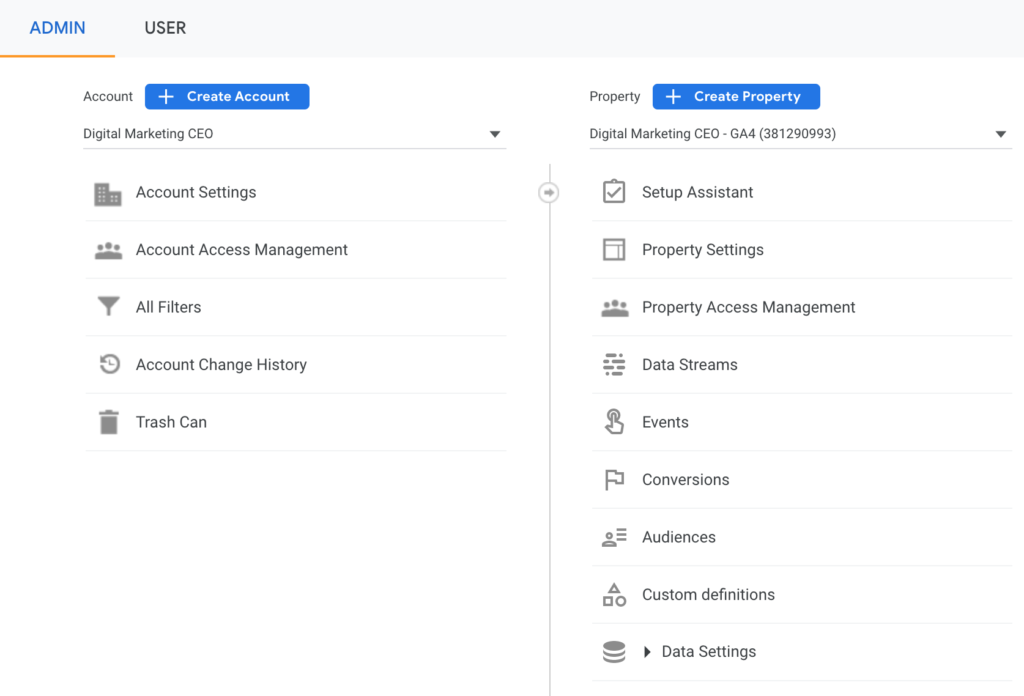
Accessing Google Analytics Admin Panel:
To begin blocking IP addresses, log in to your Google Analytics account and navigate to the Admin panel. Click on the “Admin” tab located at the bottom left corner of the page.
Creating a Data Filter
Within the Admin panel, locate the “Property” column and click on “Data Settings.” Under “Data Settings,” you will find “Data Filters.” Click on it to access the filter settings.
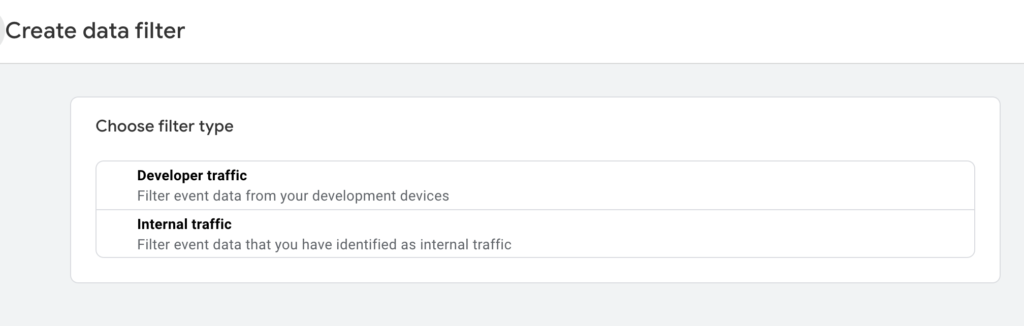
Setting up the Internal Traffic Filter
Within the Data Filters section, click on the “Create filter” button. Choose the filter type as “Internal traffic” to exclude internal IP addresses from your data.
Configuring Filter Details
Next, provide a descriptive name for the filter, such as “Block Internal IP Traffic.” In the filter operation, select “Exclude” to exclude the specified IP addresses.
Testing the Filter
To avoid affecting your actual data, set the filter state to “Test.” This allows you to ensure that the filter works correctly without impacting the real-time data in Google Analytics.
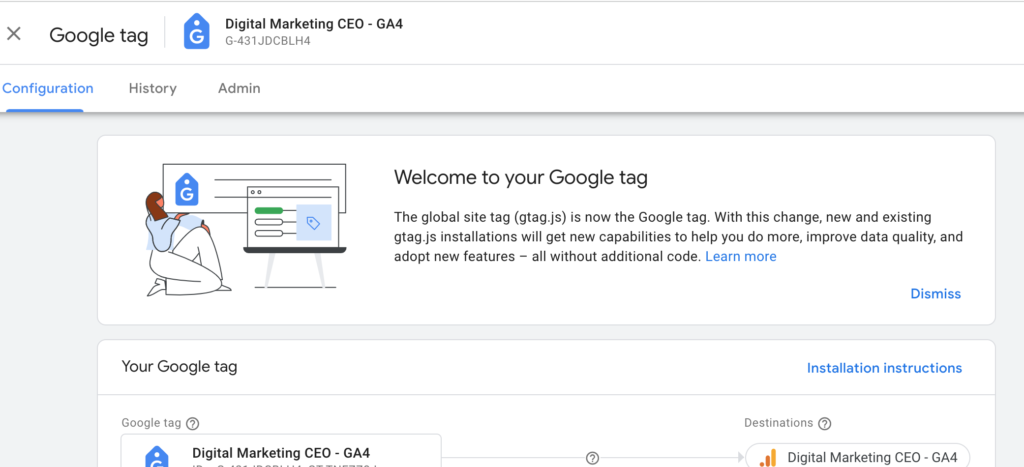
Implementing the Filter in Google Tag
In the Admin panel, navigate to the “Data Streams” section. Find the data stream associated with your website and expand it. Scroll down to the “Google Tag” section and click on “Configure tag settings.”
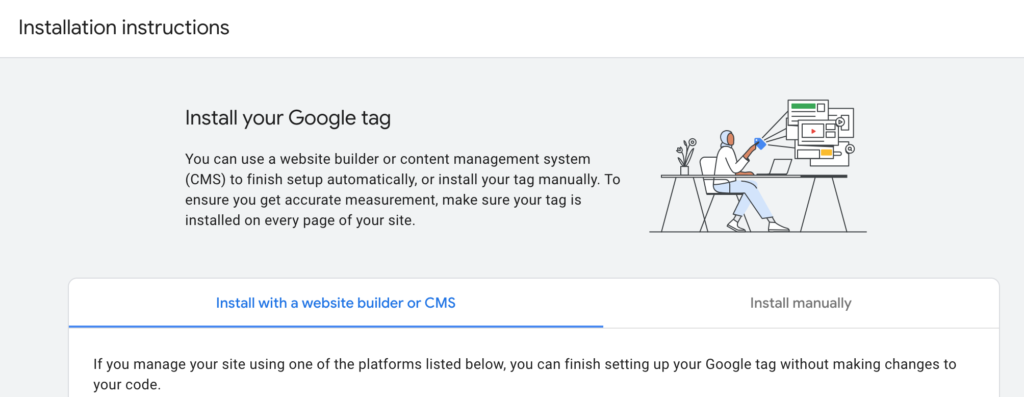
Adding the Google Tag Manually
Within the Google tag configuration, click on “Installation instructions.” You can either scan the site to find the appropriate installation method or choose “Manual Installation.” Copy the provided tag from the box.
Inserting the Google Tag
Access your website’s code and locate the “header.php” file. Insert the copied Google tag right after the <head> tag. Save the file to apply the changes, ensuring the Google tag is present on all pages of your website.

Testing the Filter
To avoid affecting your actual data, set the filter state to “Test.” This allows you to ensure that the filter works correctly without impacting the real-time data in Google Analytics.
Implementing the Filter in Google Tag
In the Admin panel, navigate to the “Data Streams” section. Find the data stream associated with your website and expand it. Scroll down to the “Google Tag” section and click on “Configure tag settings.”
Defining Internal Traffic by IP
In the Google tag configuration, go to the settings section and click on “Show all.” Choose “Define internal traffic” and click on “Create.” Name the rule, such as “Internal Traffic by IP.” Set the traffic_type value as “internal.”
Blocking IP Addresses
Under the IP addresses section, choose the “match type” as “IP address equals” (although other options are available). Enter the IP address you want to block in the value box. If you’re unsure of your IP address, search for “What is my IP” on Google to find out. Click on “Add condition” if you need to include any other IP addresses.
By following these straightforward steps, you can block internal IP addresses from appearing in Google Analytics, ensuring cleaner and more accurate data for your website. Remember, it may take up to 48 hours for the changes to take effect. Regularly monitor your Google Analytics data to ensure the filter is working correctly. By eliminating internal traffic, you can obtain more precise insights and make informed decisions based on the behavior of your actual visitors.
Related
How is GA4 Real Time User Tracking Different from the Original Google Analytics?
Maximizing Your Website’s Potential: How to Use Demographic Details in Google Analytics 4
How to Find Bounce Rate on Google Analytics 4